How to Sew an Easy DIY Ruffled Petti Romper
This post may contain affiliate links · This blog generates income via ads
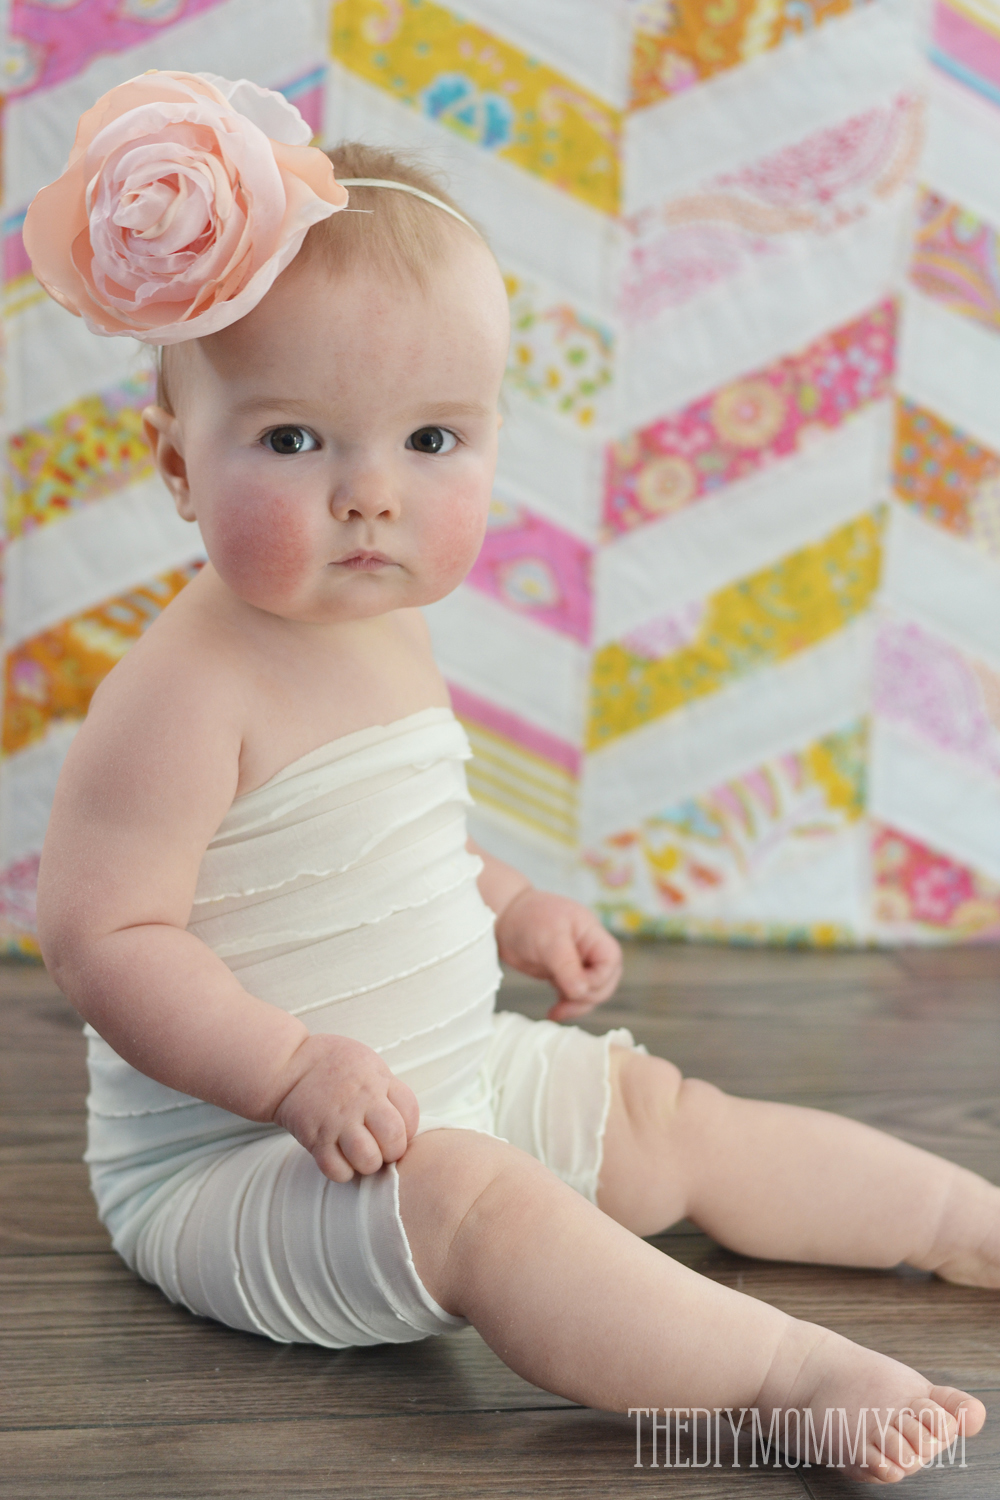
This past Saturday we celebrated Baby B’s first birthday. I’m still shaking my head as I type this and I’m wondering where this past year has gone. Wasn’t it just last week that I was bundling her up in a piece of ruffled fabric and taking her newborn photos? No, wait… that was LAST YEAR. It’s crazy. As I was feeling rather sentimental over the weekend, I found the strip of ruffled fabric that I wrapped my little newborn in and I transformed it into a ruffled petti romper for Baby B to wear for her first birthday photos. Then, I took some photos of her in front of the same quilt that I laid her on for her new baby photos. It was so sweet and so meaningful!

Gah. I can barely handle the cuteness here. Here’s my darling baby girl at 2 weeks old and at one year old with the same DIY herringbone baby quilt (tutorial here) and ruffled fabric.

This ruffled petti romper was a fun and simple little sewing project, and it makes a great outfit for special photos.

I paired it with a handmade rose (tutorial here) that I sewed onto a piece of elastic and used as a headband. Voila! It’s instant baby couture – DIY style.
Here’s how to make a really simple petti romper.
Materials:
- 1/2 yard stretch ruffle fabric
- elastic lace for shoulder straps (optional)
- serger or sewing machine
Directions:

Measure your baby’s chest circumference and the length of their torso from their underarms to their crotch. Cut a piece of ruffle fabric that has a width of 2″ less than Baby’s chest circumference and a length of Baby’s torso length plus 3″. Make sure you lay the ruffles flat as you cut.
If you don’t want the romper quite as tight as mine (I wanted mine tight because I didn’t want to add straps), make the square the same width as Baby’s chest circumference and sew on some shoulder straps out of elastic lace.

Fold the fabric in half width wise and sew it together leaving 3″ open at the bottom edge. Cut a 3″ slit on the opposite side of the bottom as shown above. These will be the leg openings.

Fold the petti romper so that the leg openings are on top of one another, and stitch them together as shown above. I used a serger, but a sewing machine would also work since this stretch fabric won’t fray.
You can leave the top of the romper unfinished as mine is, or sew on some elastic lace straps.

I sewed one of my DIY fabric flowers onto some 1/4″ elastic to make a headband to complete this fun little outfit!
To take these photos and to make a simple DIY photo set, I taped Baby B’s quilt to our shoe cabinet in our entry:
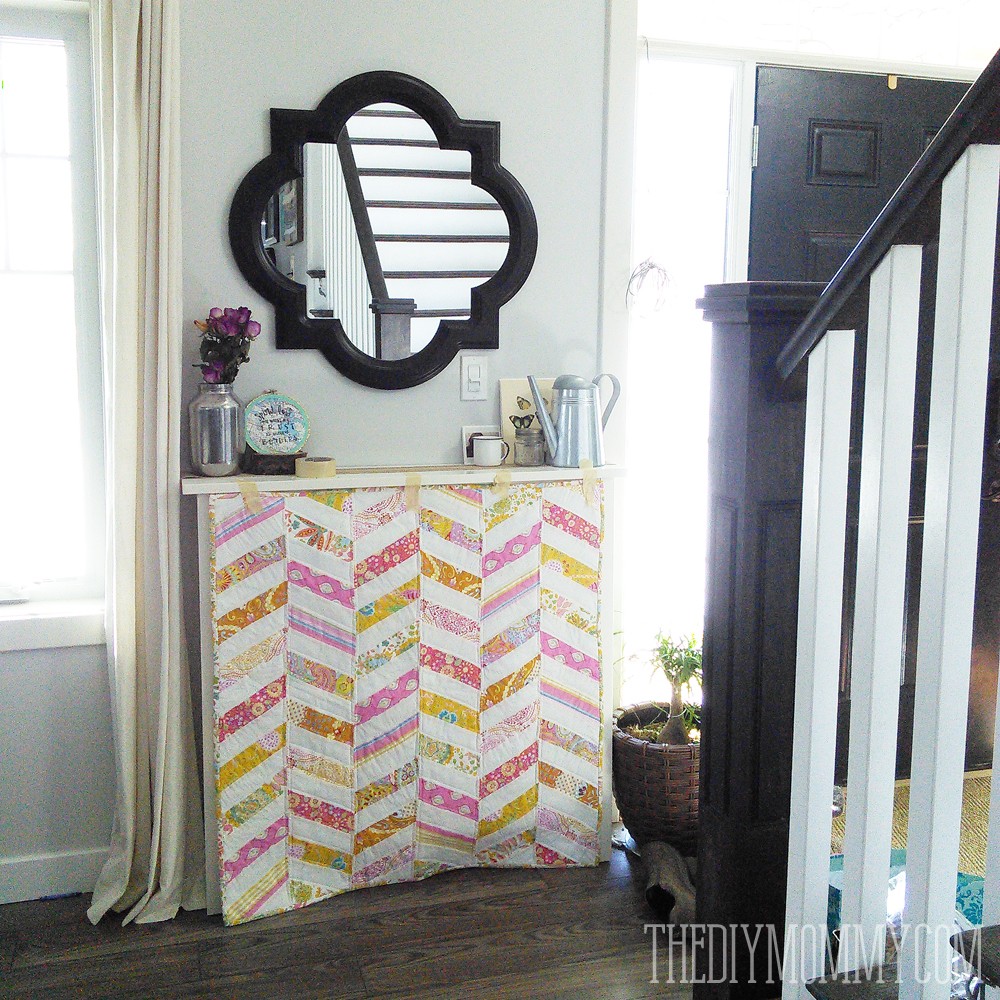
There is a lot of natural light in our entry, so I thought it was the perfect spot for photos. I waited for Baby to be in a relatively happy mood, let her play on the floor in front of the quilt backdrop, and I shot away with my DSLR.
Happy First Birthday, Baby B!
Disclaimer: This post contains affiliate links. Thanks for supporting TheDIYMommy.com!
Great DIY creation. Thank you for the awesome tutorial.
I shared this post on DIY best posts.