Crochet an Organic Cotton Granny Square Baby Blanket – Part 1: The Squares
This post may contain affiliate links · This blog generates income via ads
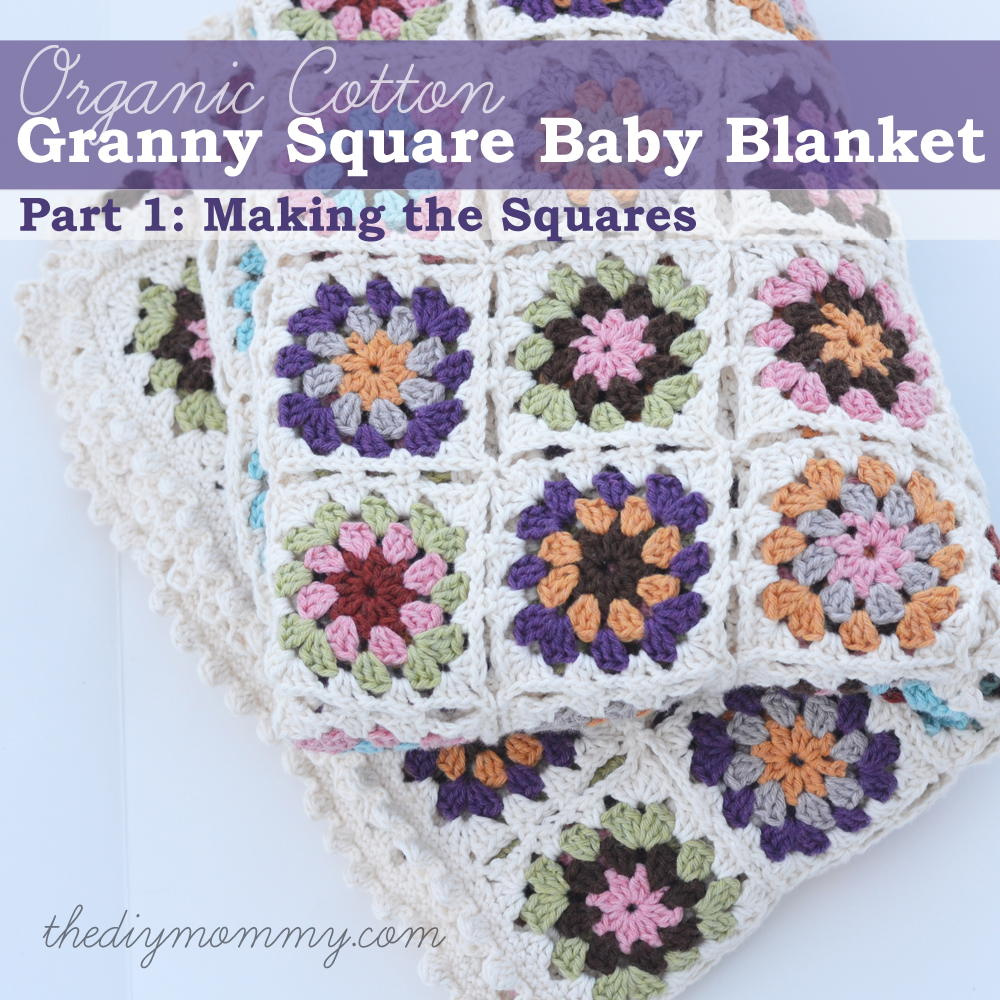
I fell in love with vintage-looking granny square blankets last spring when I saw them all over Pinterest. I especially liked the ones with vibrantly coloured squares surrounded by white or cream stitches. So pretty!
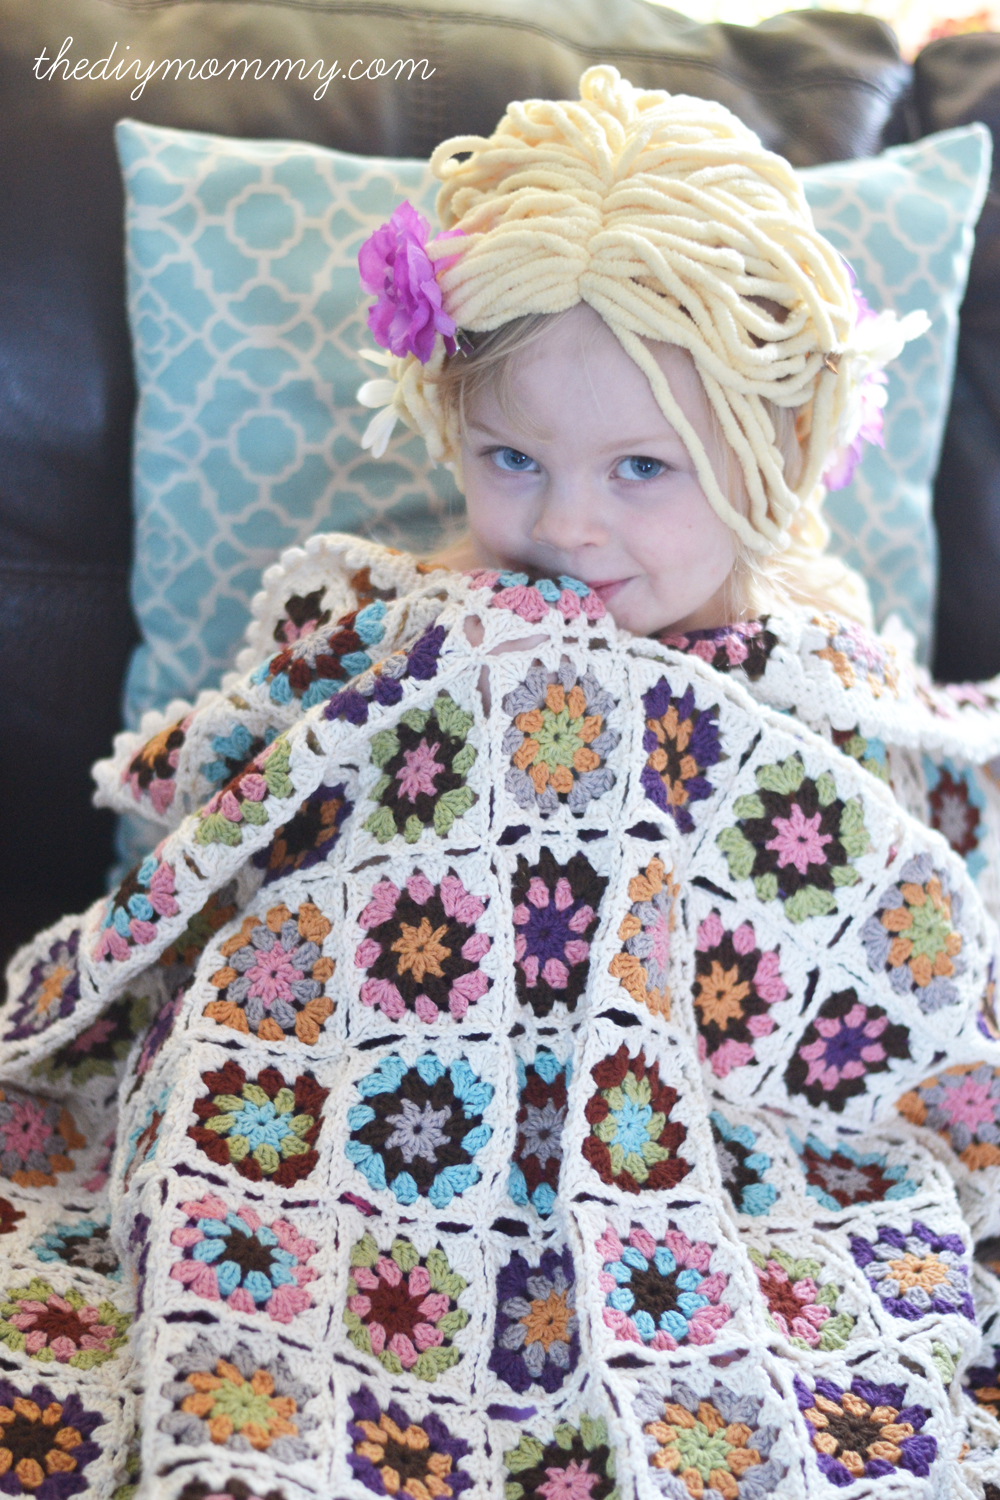
I made it my mission starting last May to crochet a granny square blankie that I could use for my baby girl (or just as a throw in our living room). This project took me a long time (8 months!) but it was well worth the effort. And, honestly – it was a relaxing little project that was easy to pick up any time.
The pattern was concocted by staring at a million pictures of blankets I loved, and with the help of my mom who is wonderful at eyeballing crocheted works and duplicating them. I used a really soft and lovely organic cotton sport-weight yarn from Knit Picks. It was nice to work with and also budget-friendly. The yarn has since been discontinued, but check out Knit Picks for other inexpensive yarns in natural fibers.
Here’s how I made this blanket (I’ll divide this tutorial into two parts because it’s quite long)!
Finished blanket measures approximately 48″ by 64″. Gauge isn’t really important unless you want the blanket to be exactly this size (if so, the squares should measure about 4″ wide).
Materials:
- 2 skeins each of 8 different colours of yarn (164 yard skeins)
- 8 skeins of white/cream coloured yarn (164 yard skeins)
- size J crochet hook
- yarn needle
Directions:
Need help with basic crochet stitches and techniques? I recommend taking a Crafsty class on basic crochet.
Making the Squares
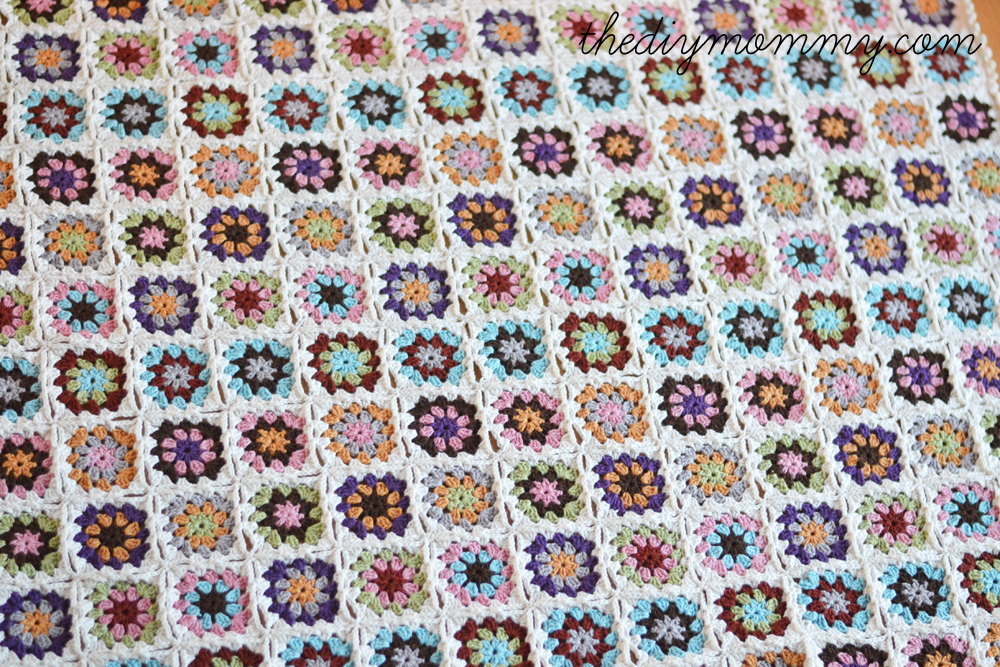
I made 12 different combinations of granny squares and I mixed up the colours in a way that was visually appealing to me. If you look at this photo, you can see the basic pattern I used. Feel free to copy it, or it’s a lot of fun to come up with your own colour combos with the different colours of yarn.
Plan the colours that will go into each of the 12 different granny squares, and then make them like this:
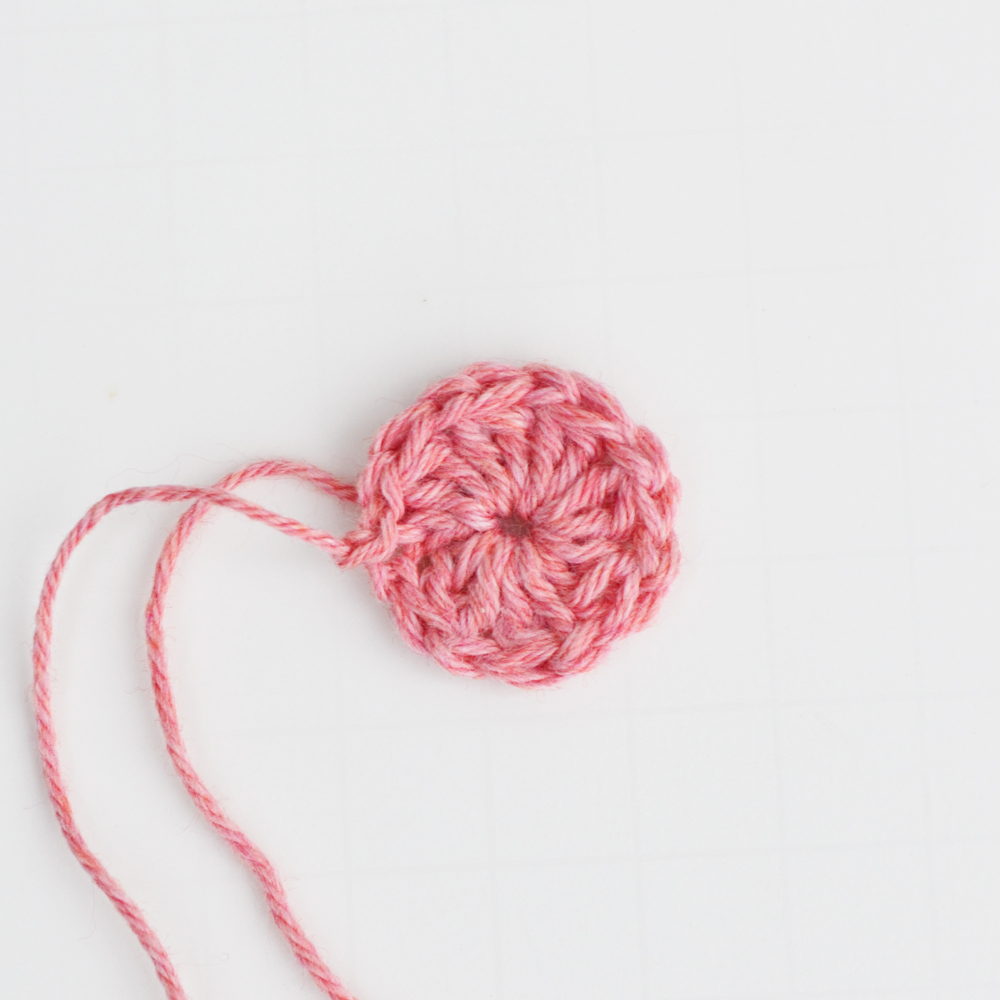
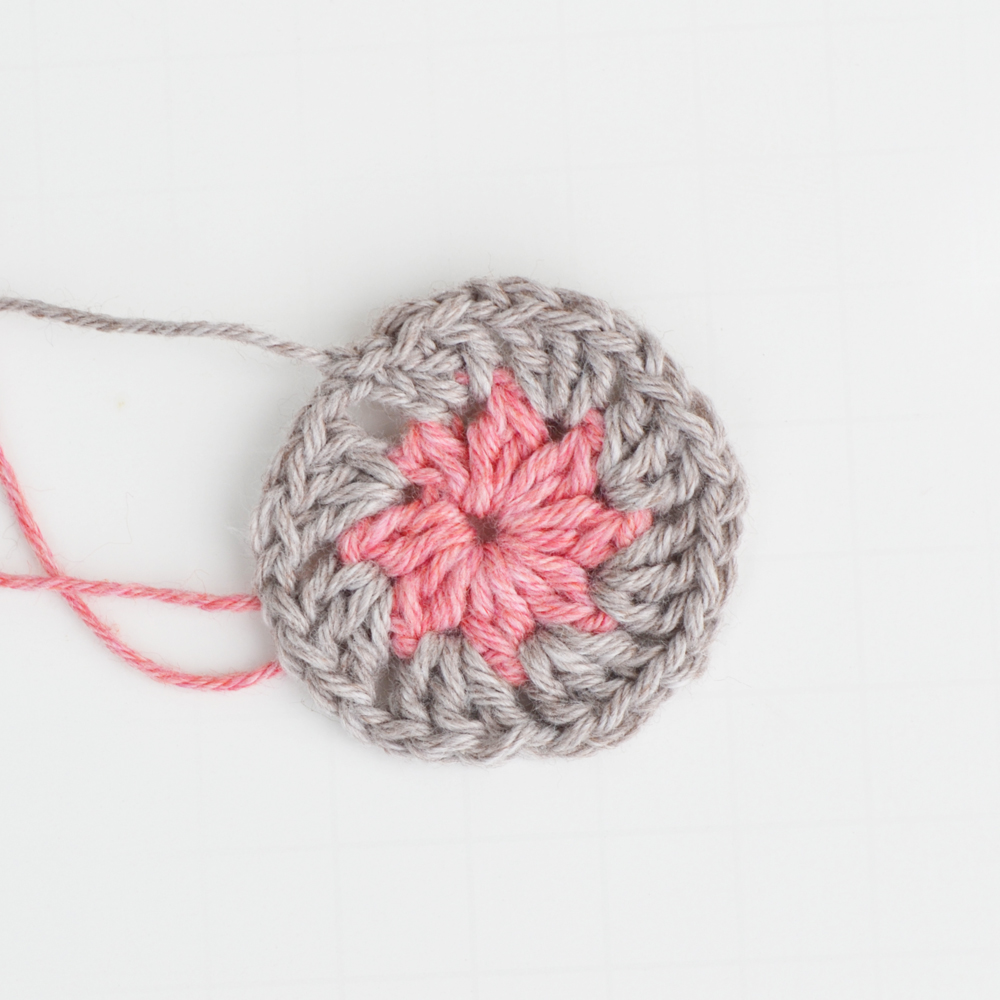
Chain 4, slip stich into the first chain to form a loop. Chain 3 (this will count as your first double crochet cluster and chain) and then dbl crochet into the loop, but don’t do the last step of the dbl crochet (leaving 2 loops on your hook). Dbl crochet into the loop again, and then on the final step pull your yarn through all the loops on your hook. This forms a double crochet cluster. Chain 1.
Repeat a dbl chrochet cluster + chain 1 6 more times so that you have 8 dbl crochet clusters on your loop. Slip stitch into the 3rd chain of your first faux dbl crochet cluster. Pull yarn through loop and cut, leaving a tail.
With your second chosen colour of yarn, attach it in a chain one hole. Chain3 (this will act as your first dbl crochet + chain 1). [Dbl crochet into the next chain 1 hole 3 times. Chain 1. ] Repeat until you’re at the hole you began with, dbl crochet 2 times and slip stitch into the third chain you started with. Pull yarn through loop and cut, leaving a tail.
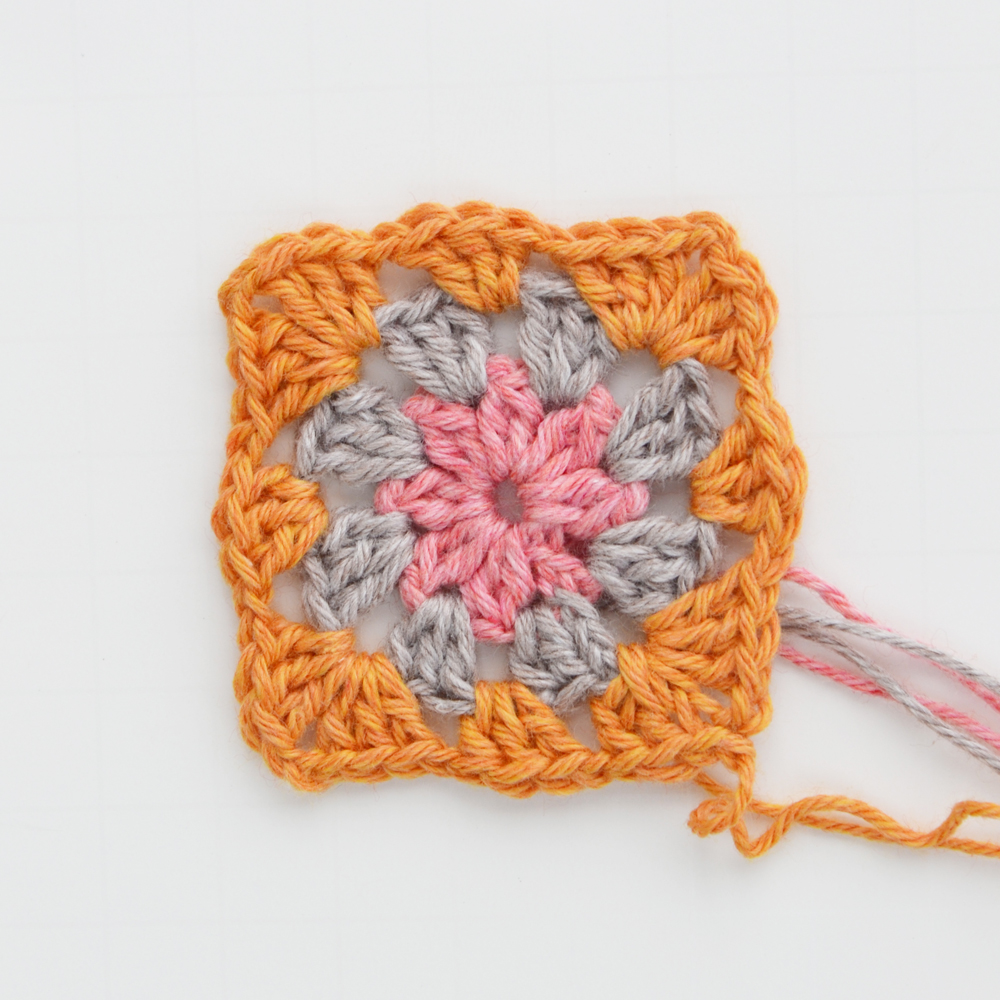
With a third colour, attach yarn to one of the chain 1 holes of the previous round. Chain 3 (this will act as your first dbl crochet + chain 1). [ Dbl crochet 3 times into the same hole (this forms a corner of the square), chain 1, dbl crochet 3 times into the next hole, chain 1, dbl crochet 3 times into the next hole, chain 1 ] Repeat 3 times until you’re at the hole you started on and then slip stitch into the 3rd chain from the beginning. Pull yarn through loop and cut, leaving a tail.
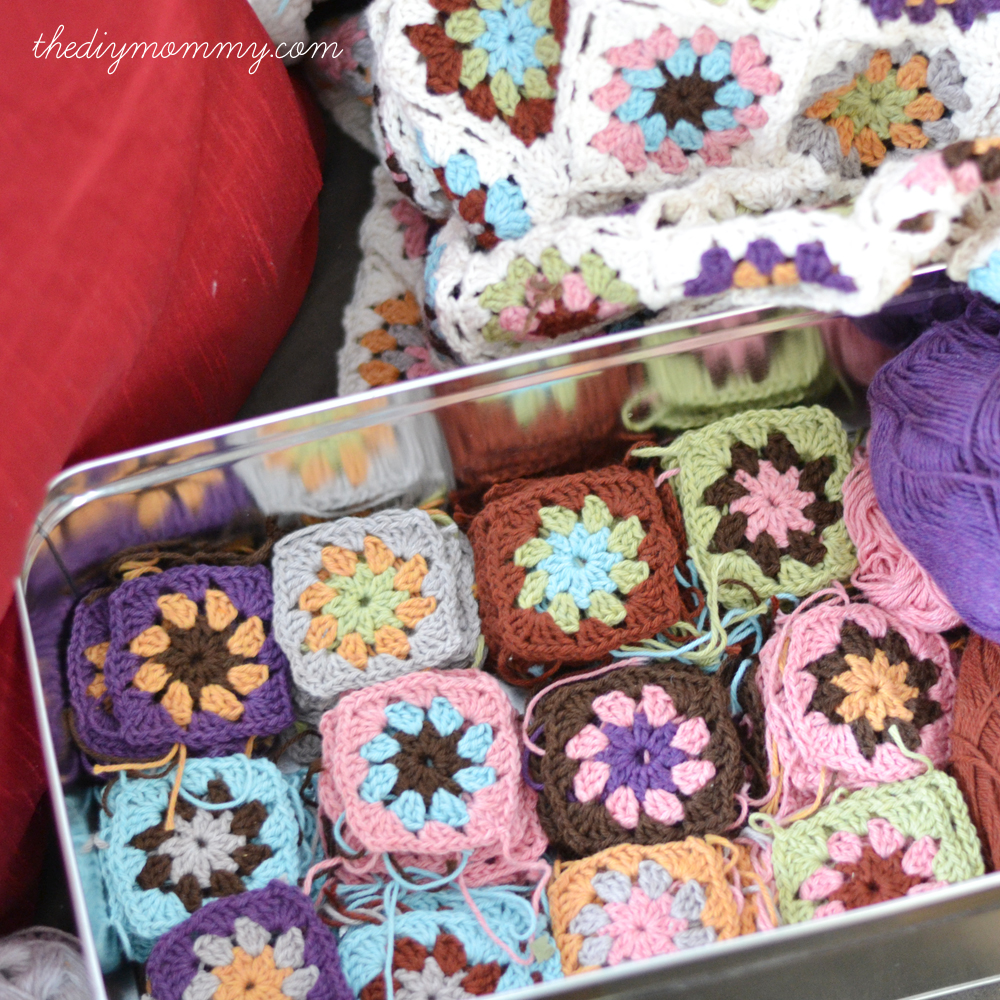
You will need to make 16 of each of the 12 squares. I used a tin to store them in. This is a great project to do a bit at the time – do a couple of squares each night as you relax!
Click here to move to Part 2 – Joining the Squares and Finishing the Blanket
I am really enjoying this project… Thank you!