Build a Simple DIY Boho Picnic Table (Low Profile)
This post may contain affiliate links · This blog generates income via ads
Summer is here and with it comes the opportunity to spend more time outdoors. If you have a backyard, patio, or deck, why not make it your new gathering spot? A great way to do this is by creating a low-profile picnic table that is perfect for summer evenings and casual outdoor dinners. Today, I’m going to show you how to create a simple DIY boho picnic table that will inspire your inner creative and can be built in just a few hours.
Every summer I like to create at least one special picnic evening outside for my daughters and me. Sometimes we’ll have cupcakes on the porch, and other times we’ll have a picnic. I’ve always loved short boho-style picnic tables that I’ve seen used for luxe picnic parties. They look so much more intimate and casual than a traditional picnic table. Using some scrap lumber I had on hand, I was able to make one in an afternoon using only a couple of tools. We put the table in our yard and decorated it with cute boho accents like cushions, a DIY macrame table runner, and some flowers. I LOVE how this low table turned out, and it’s a great beginner’s project! Let me share with you my DIY boho picnic table tutorial.
Note: I’ve seen many pallet picnic tables similar to this, but I’m wary of using pallet wood around food. For this table, I’m using a treated wood that’s safe to use around plants and food.
Materials & Tools:
- (5) 5/4 x 6 x 8′ treated deck boards or cedar boards (I used MicroPro Sienna from Home Depot Canada)
- (1) 2 x 2 x 8′ treated lumber board
- Miter saw
- Sanding block or electric sander
- Measuring tape
- Drill
- 2 1/2″ and 2″ deck screws
- stain or MicroPro Sienna’s Cut N’ Seal
- Foam brush
- Pencil
Finished table dimensions: 48″ x 27.5″ x 12″
Cut List:
Cut the lumber with your miter saw to the measurements below.
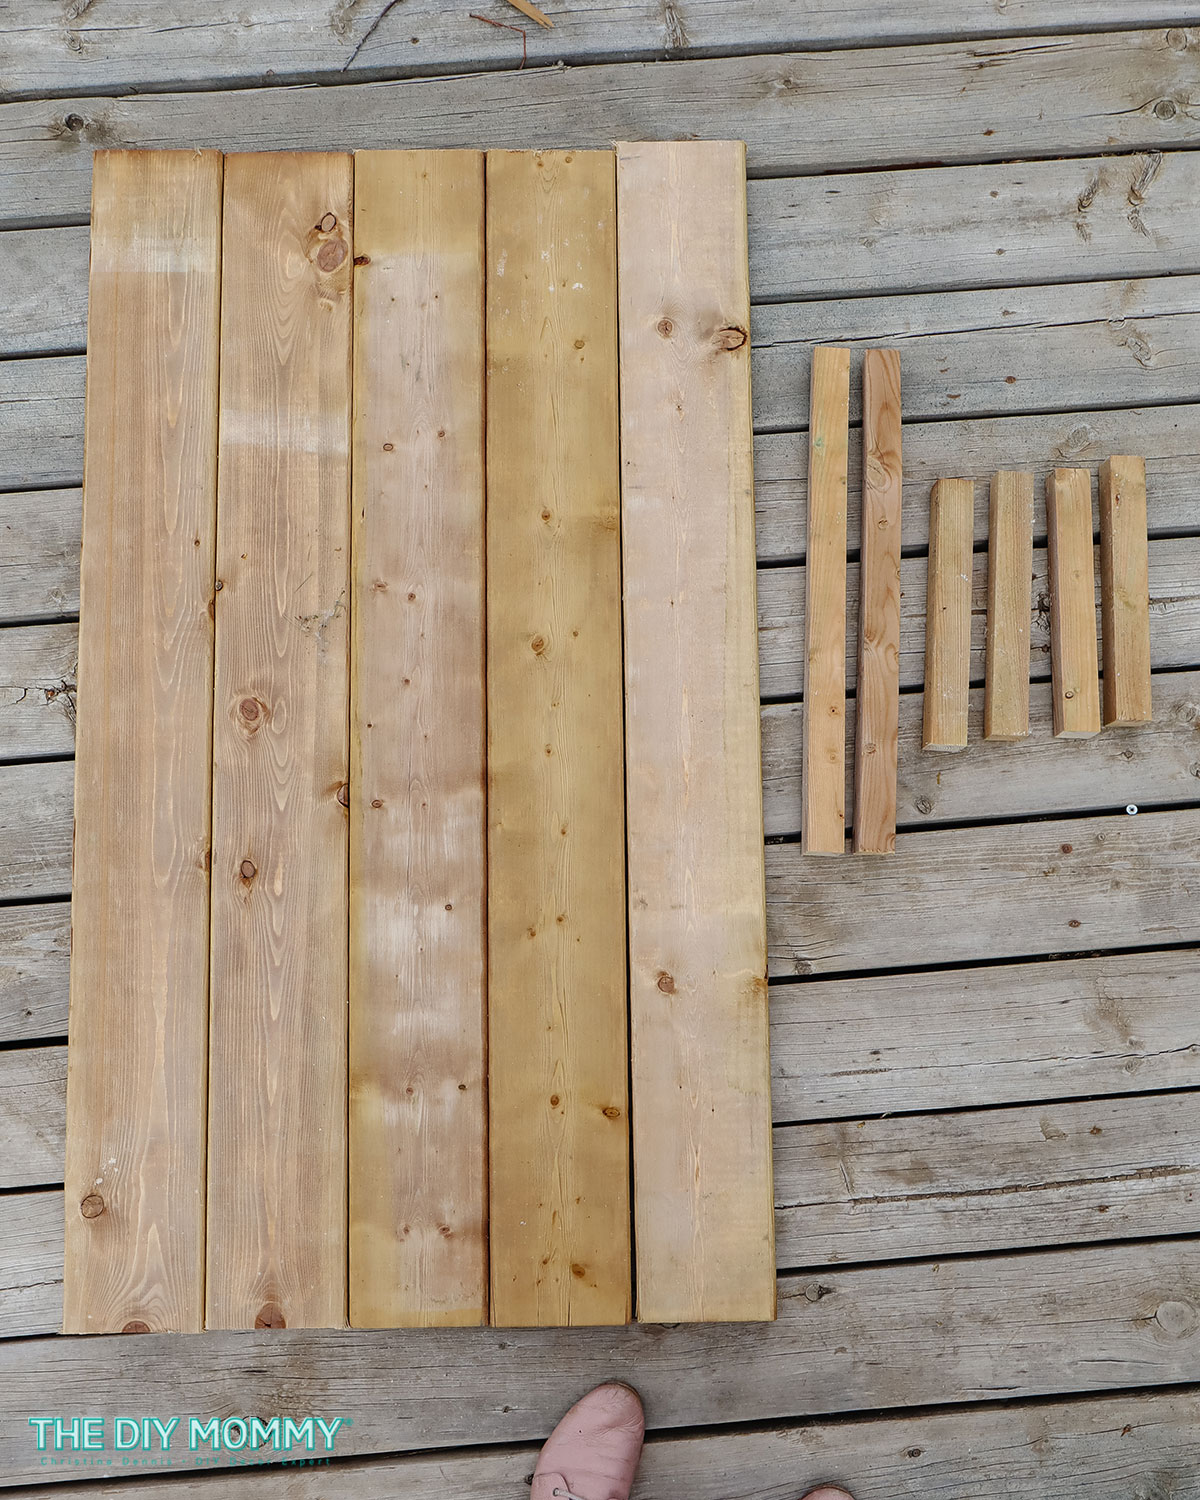
- (5) 5/4 x 6 deck boards at 4 feet long
- (2) 2 x 2 boards at 21″ long
- (4) 2 x 2 boards at 11″ long
Instructions
Sourcing, Cutting & Sanding the Lumber
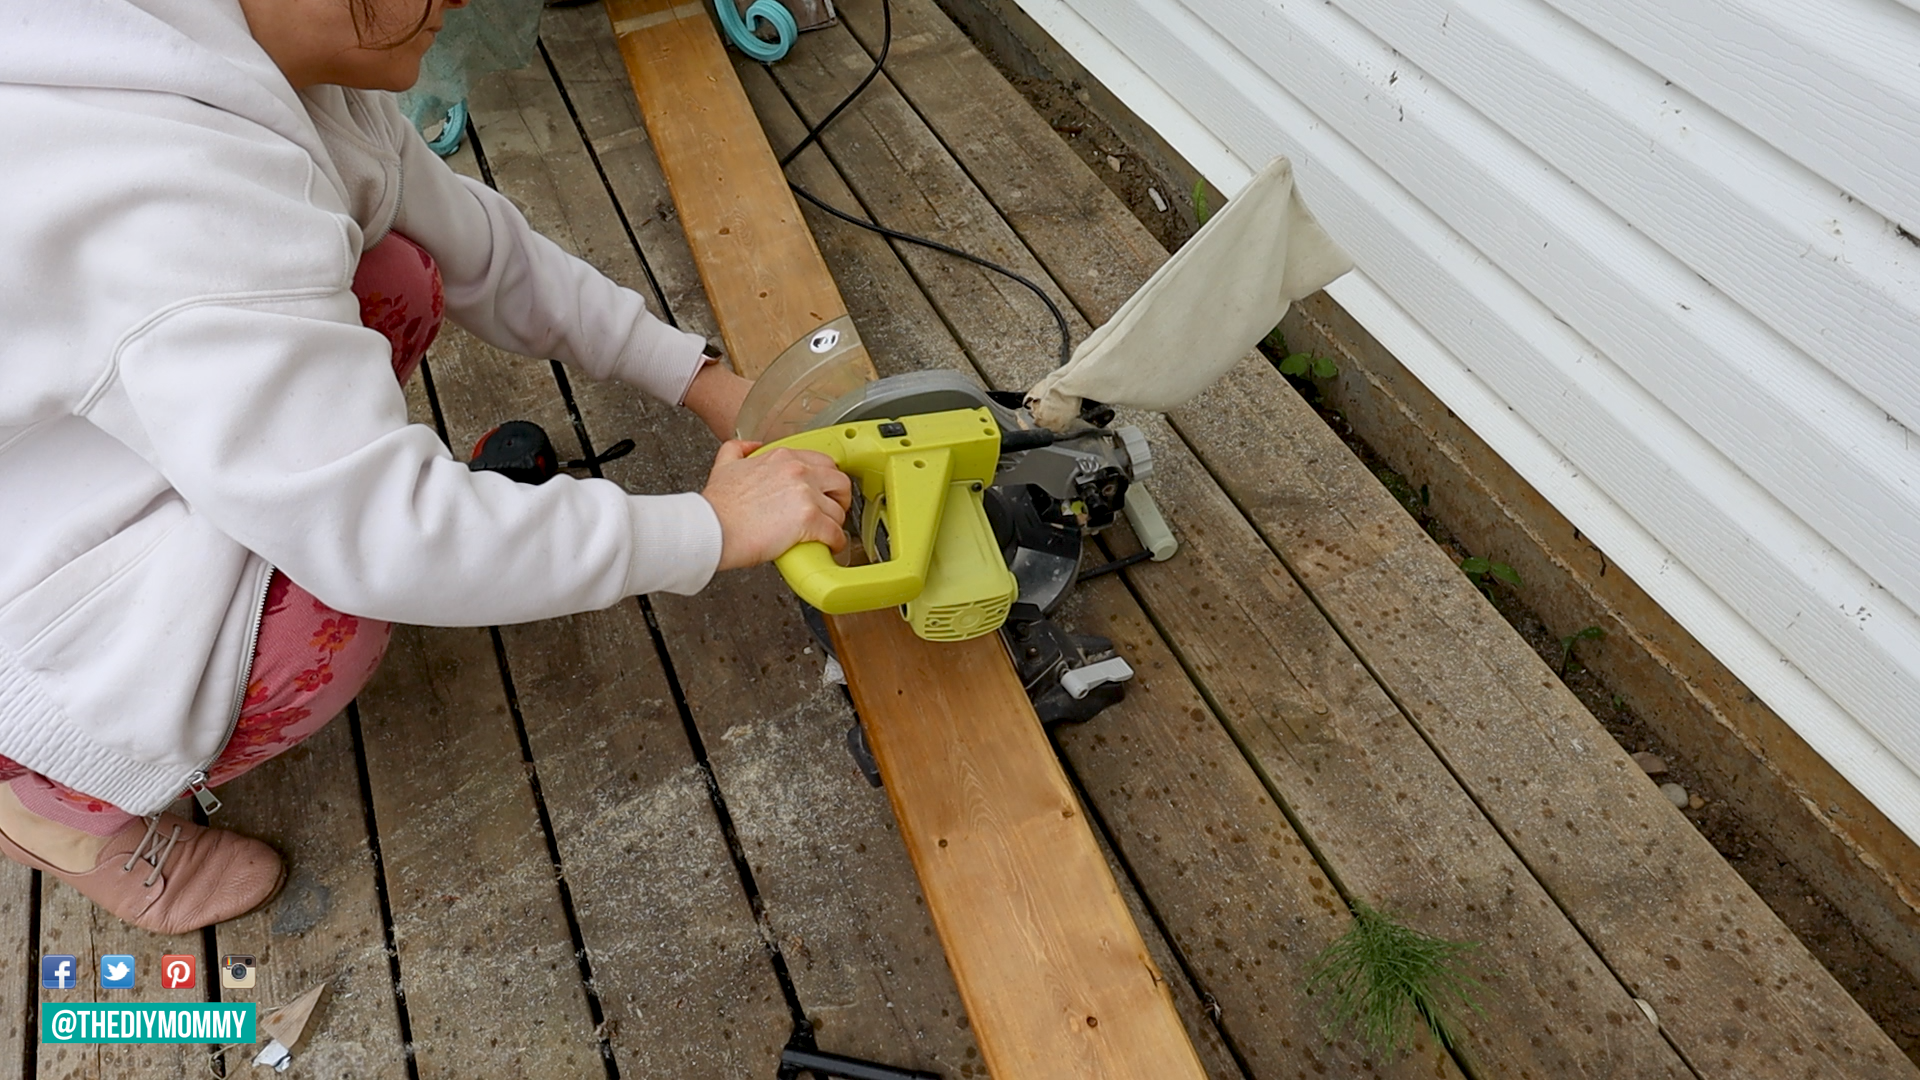
Step 1: First, purchase your treated lumber or cedar lumber and ensure that the pieces you choose are nice & straight. I went with MicroPro Sienna lumber from Home Depot Canada for its beautiful colour & durability for outdoor use (and since I had some on hand)! Cut the lumber according to the cut list above with a miter saw.
Note: You could use a circular saw to cut the lumber instead of a miter saw.
Step 2: Next, sand each piece with a sanding block or an electric sander. This will give it a smooth finish that is essential for any picnic table. Ensure all the cut edges are smooth to avoid any injuries or splinters. After sanding, use a brush to remove any debris.
Assembling the Table
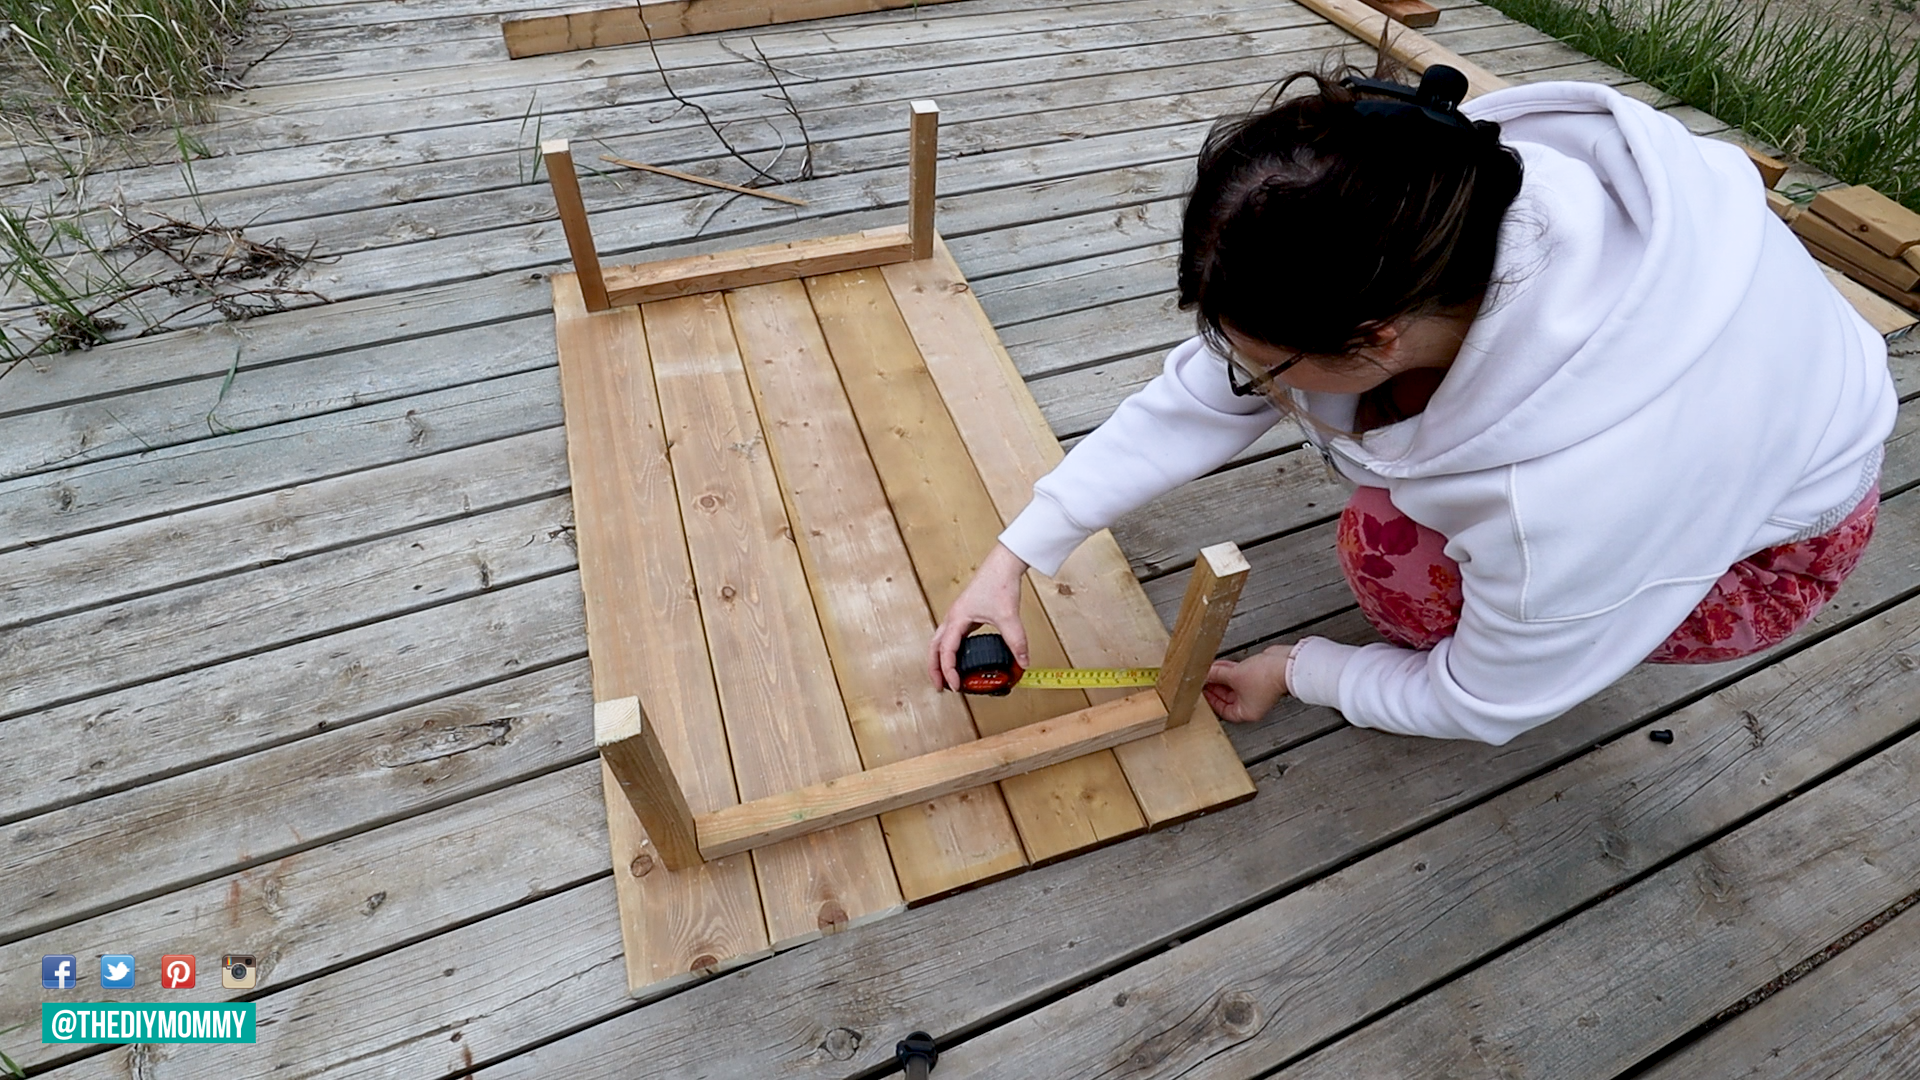
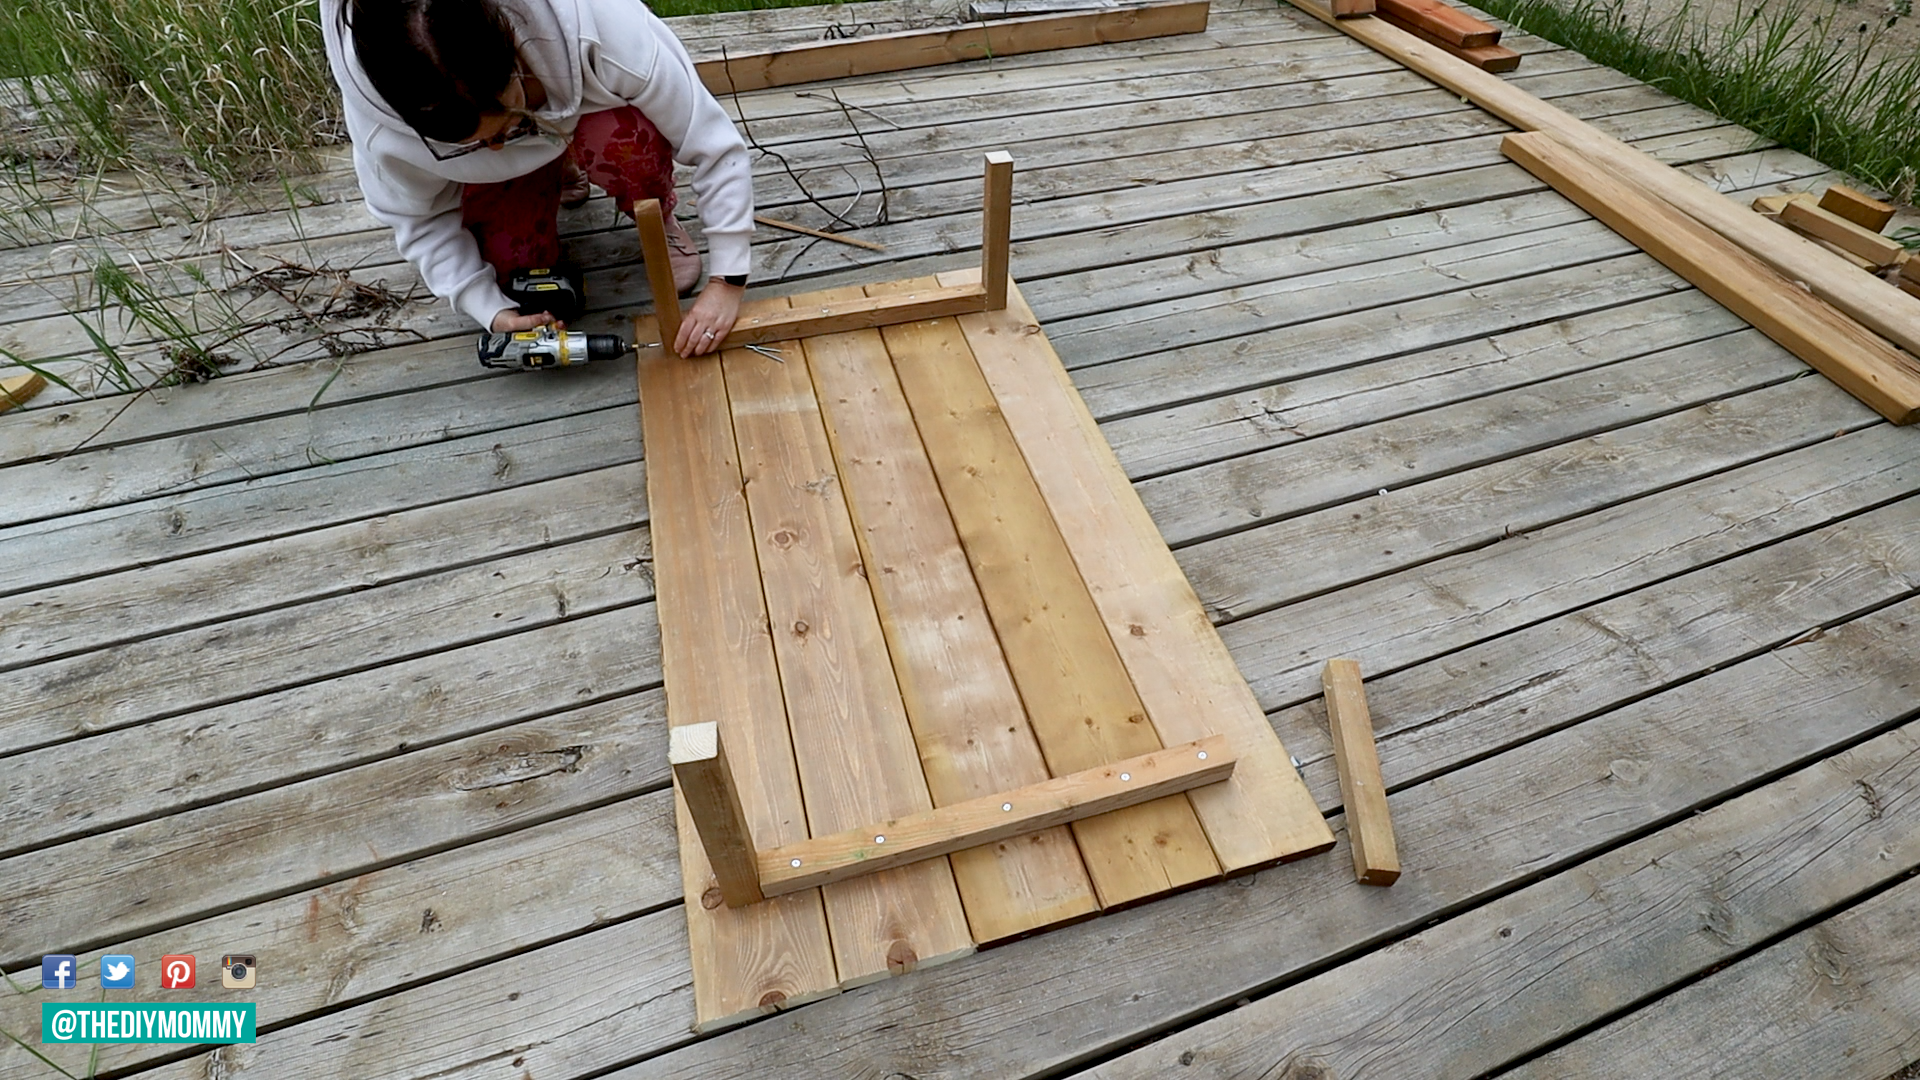
Step 3: Now, lay the deck boards beside each other on a flat surface, lining up the ends. Place one of the 21″ long 2 x 2 pieces about 4″ from one of the short sides of the table, and center it horizontally. Repeat with the other 21″ 2 x 2 at the other end of the table.

Step 4: Using a screwdriver and 2″ deck screws, attach the 21″ 2 x 2s to the ends of the table top. Ideally, you’ll want 2 screws in each 5/4 x 6 plank for stability.
Notes: You can drill pilot holes before installing the screws. Pilot holes are holes that are slightly smaller than your screw, and they will help prevent your lumber from splitting. You can also add a strip of wood glue to the 2x2s before attaching them to the table top for even more strength.
Step 5: Next you will attach the legs. Using 2 1/2″ wood screws and a drill, attach the 11″ 2×2 legs to the ends of the 21″ 2×2 pieces. Install a screw from the outside of the leg through the side of the 21″ pieces as shown above.
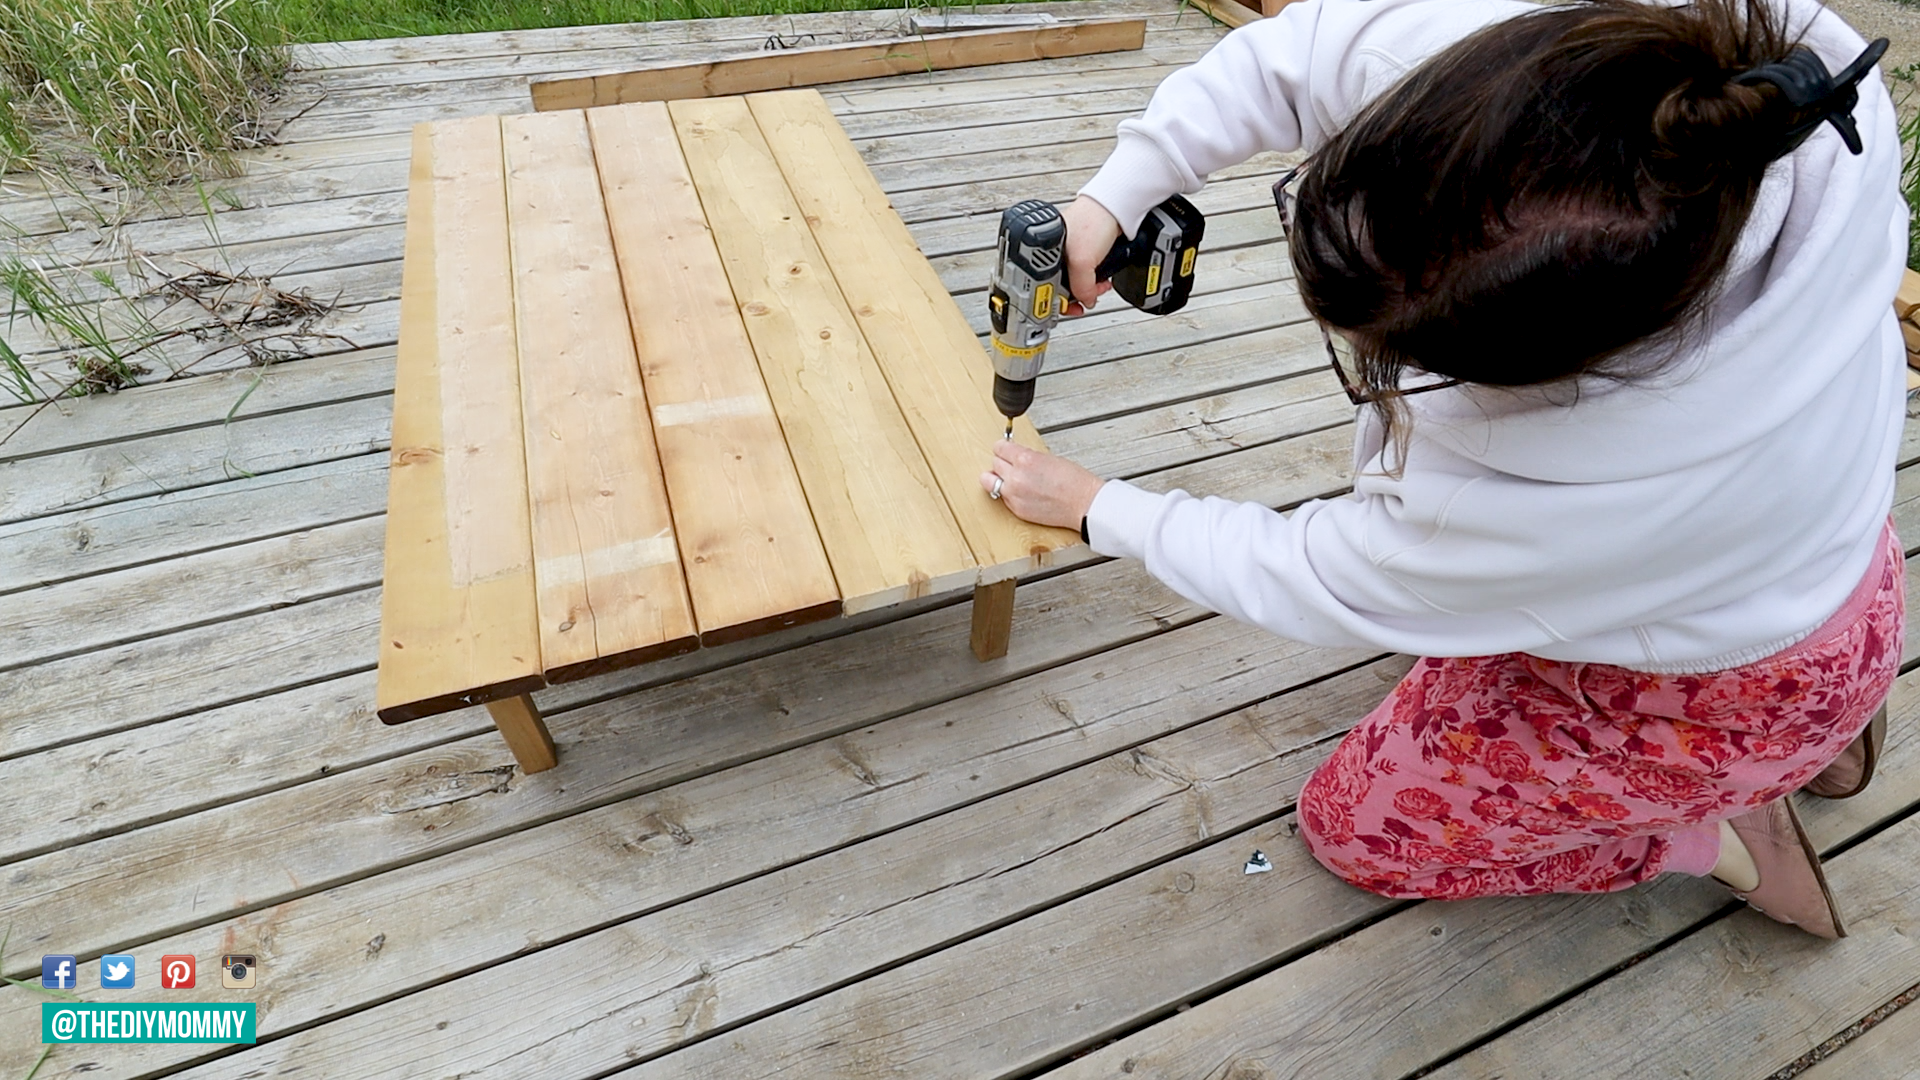
Further secure the legs by flipping the table to its right side, and then adding 2 1/2″ screws from the top of the table down through each leg. Use a measuring tape to ensure you don’t miss the leg with the screw. This will give your table added sturdiness.
Finishing the Table
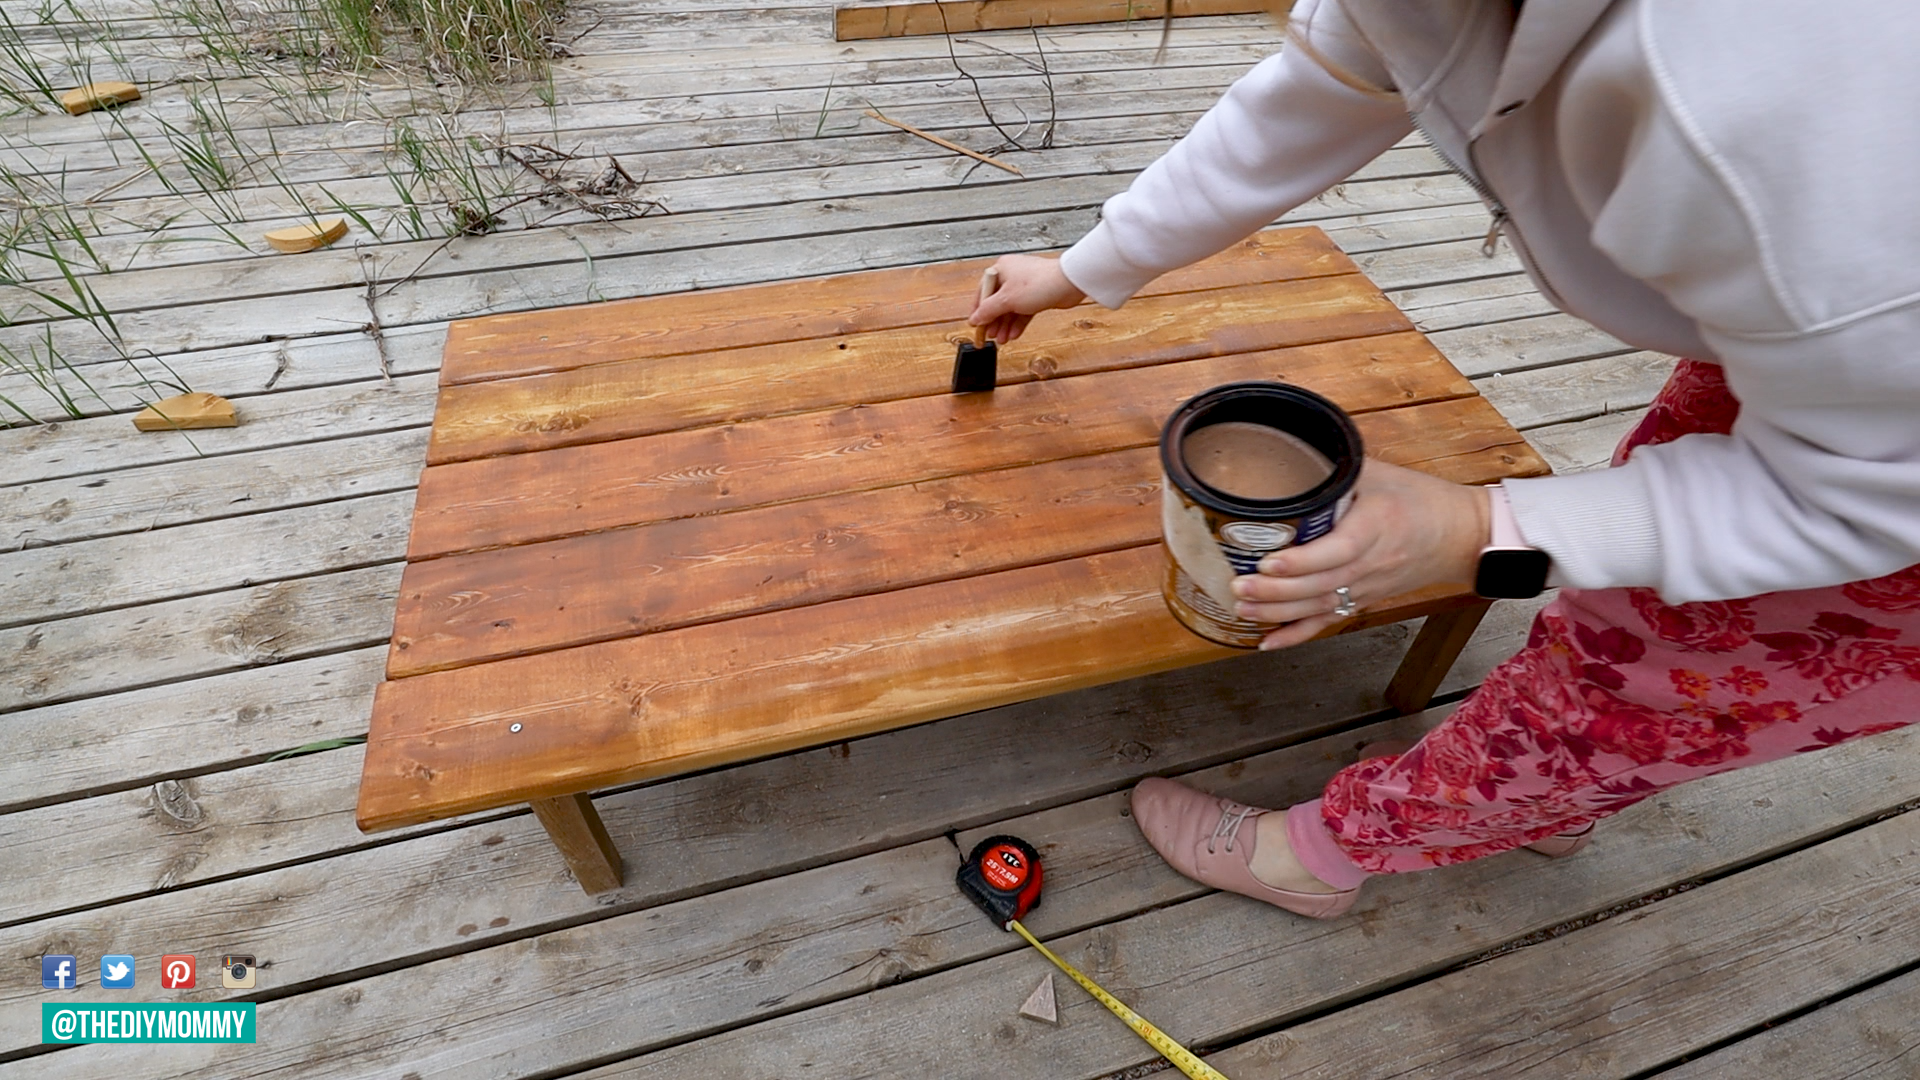
Step 6: Finally, paint or stain your picnic table. Now that the legs are attached, it’s time to add that boho flair to your picnic table. Use your selected paints or stains to add colors to the tabletop or legs. Don’t be afraid to experiment with different colors and designs to give it a unique look. Use wood stain, outdoor latex paint, spray paint or even chalk paint to add your own unique style to this build.
For my table, I’m simply using MicroPro Sienna’s Cut N’ Seal to seal off the cut ends of the lumber, and to give the top of my table a richer colour.
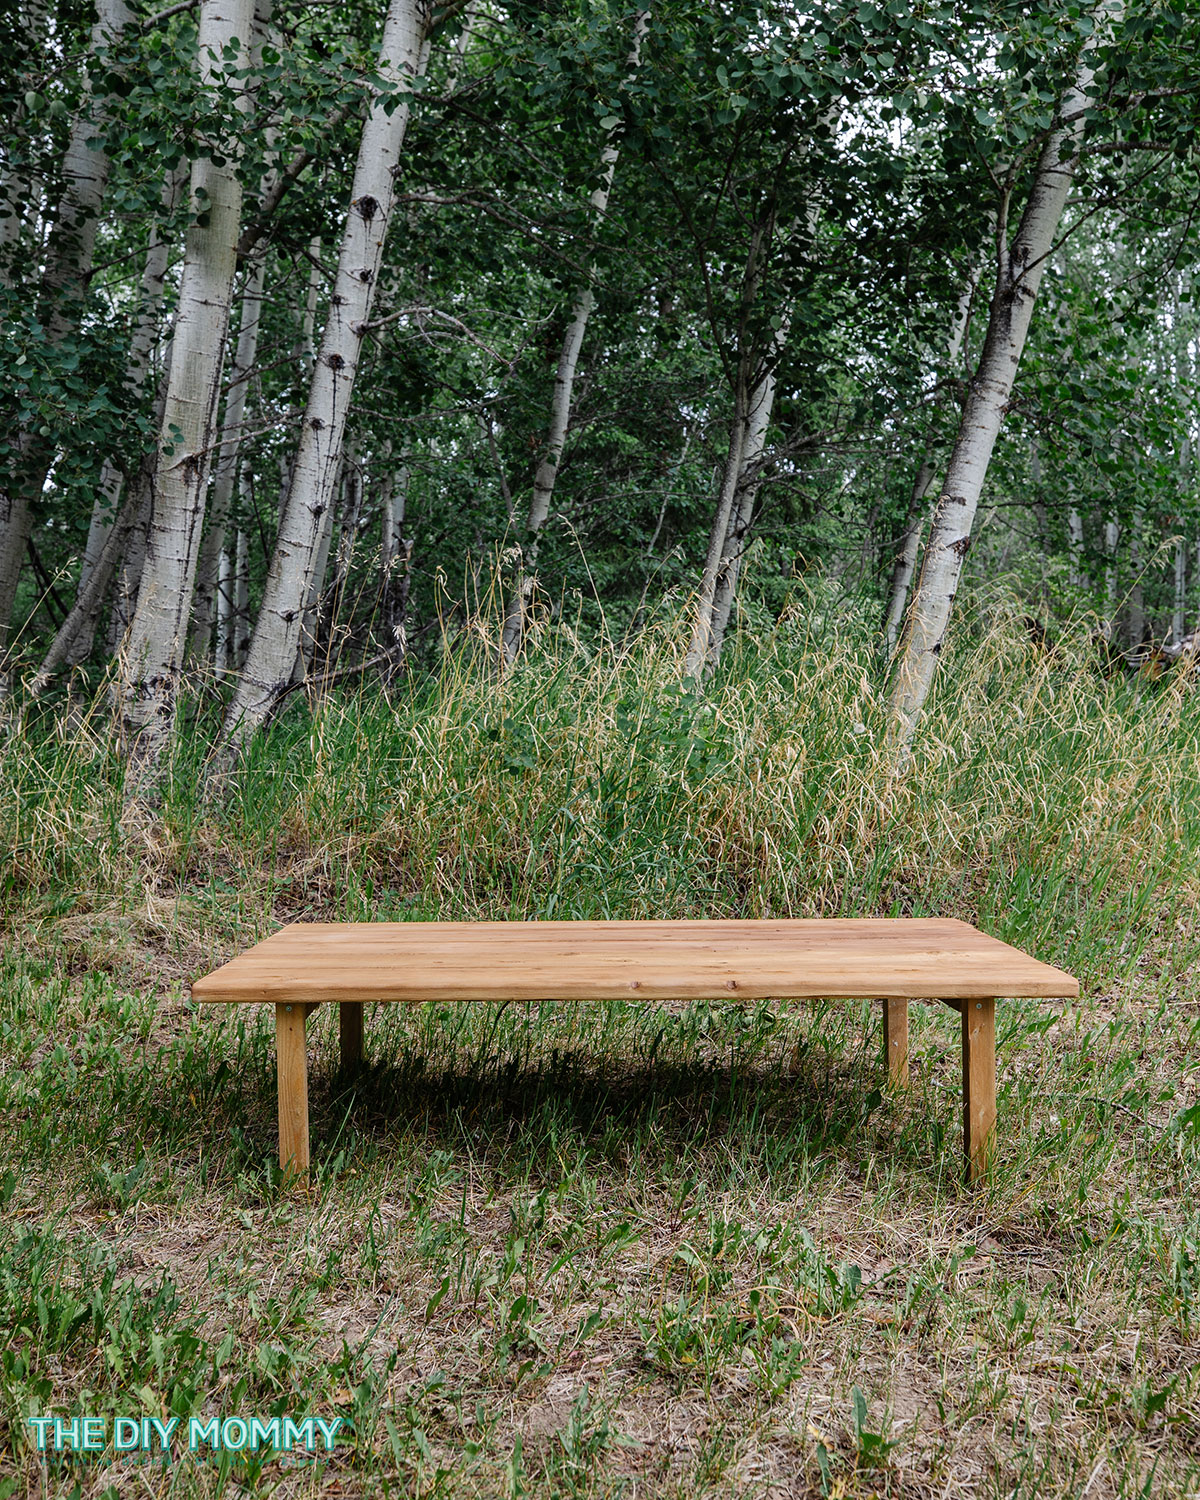
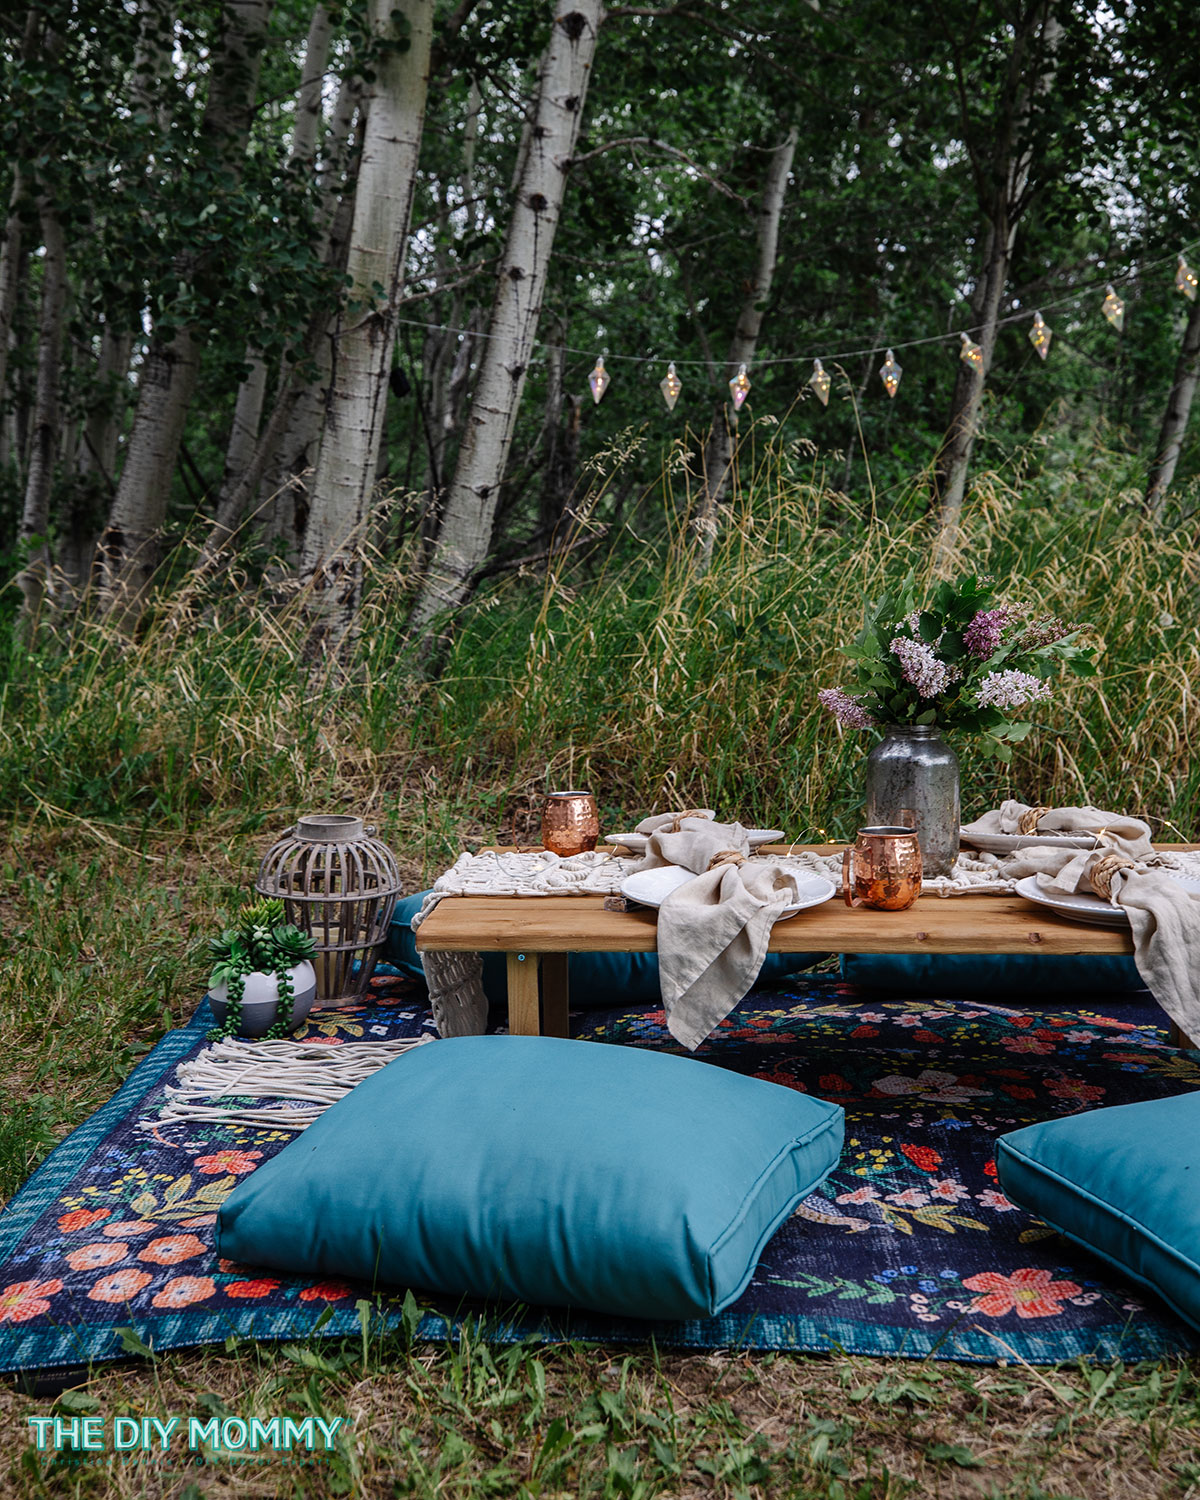
Styling your Boho Table
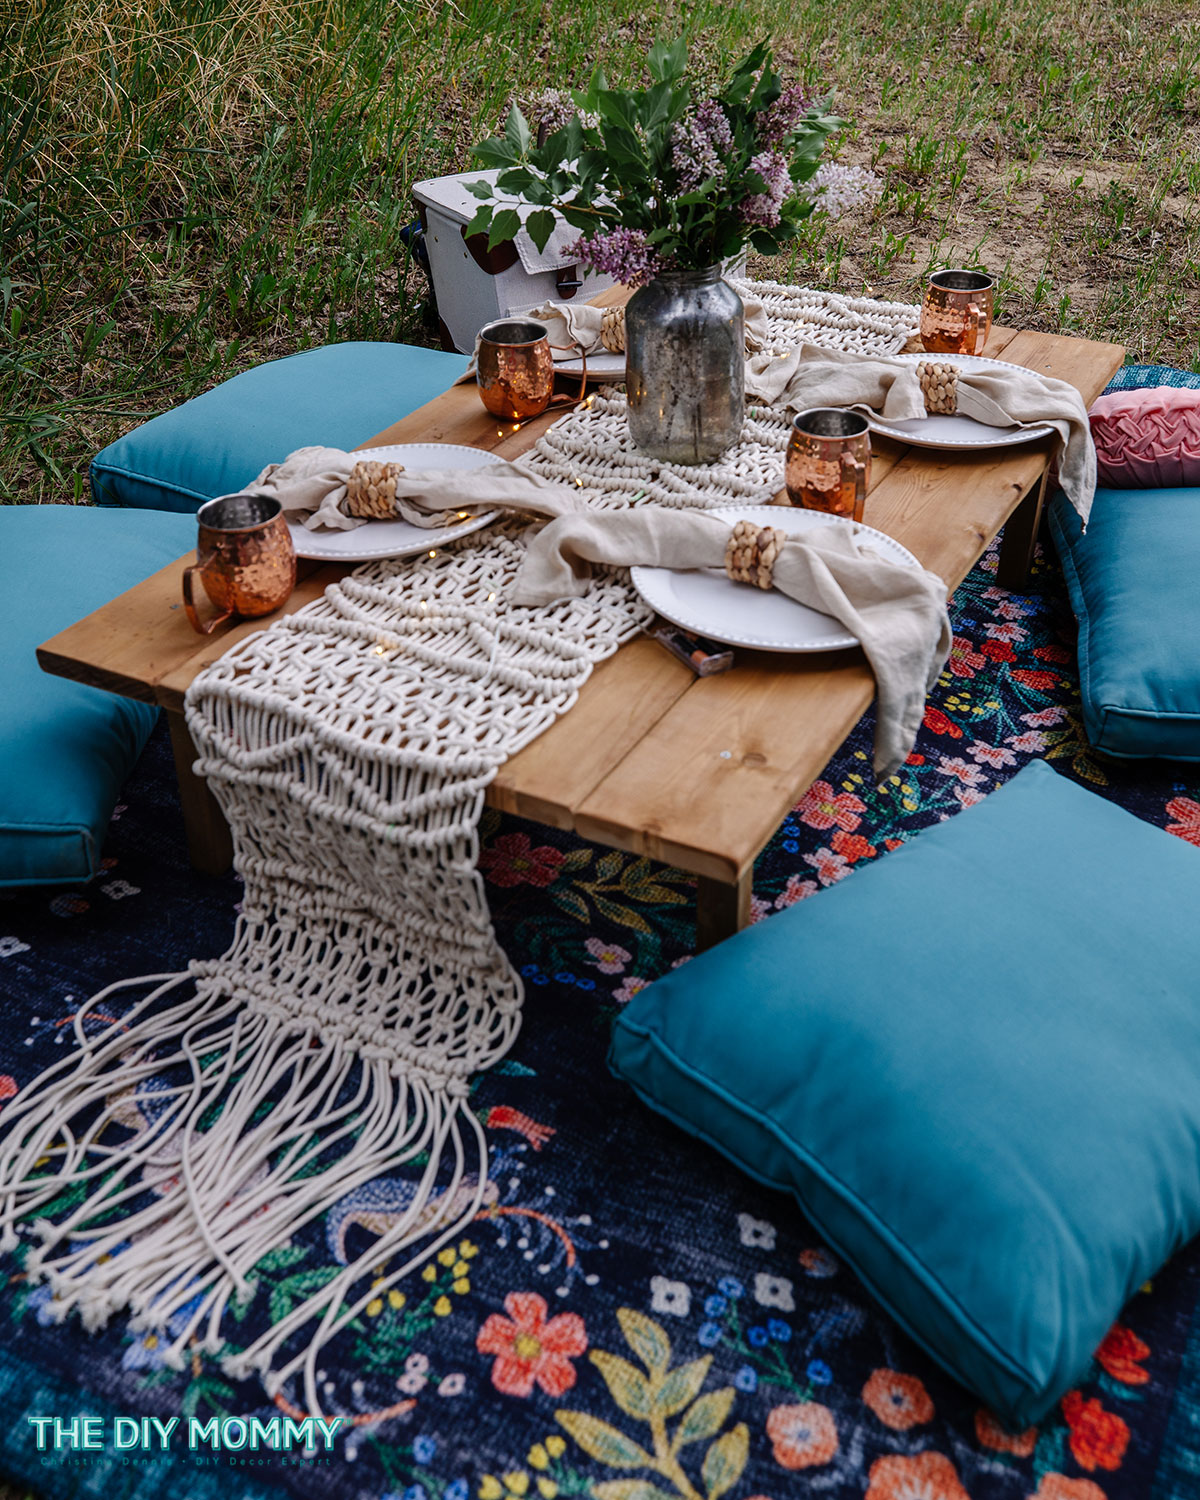
Now your DIY boho picnic table is all done! I love that this build is ultra-simple, but the finished pieces looks beautiful and it’s oh-so-versatile. Use it as an outdoor coffee table, or style it to create a stunning boho picnic. I’ve seen gorgeous luxury picnic settings at bridal showers, at weddings, for a birthday party, and just for fun! My girls loved eating dessert in our backyard on this beautiful table styled with some simple items I had on hand:
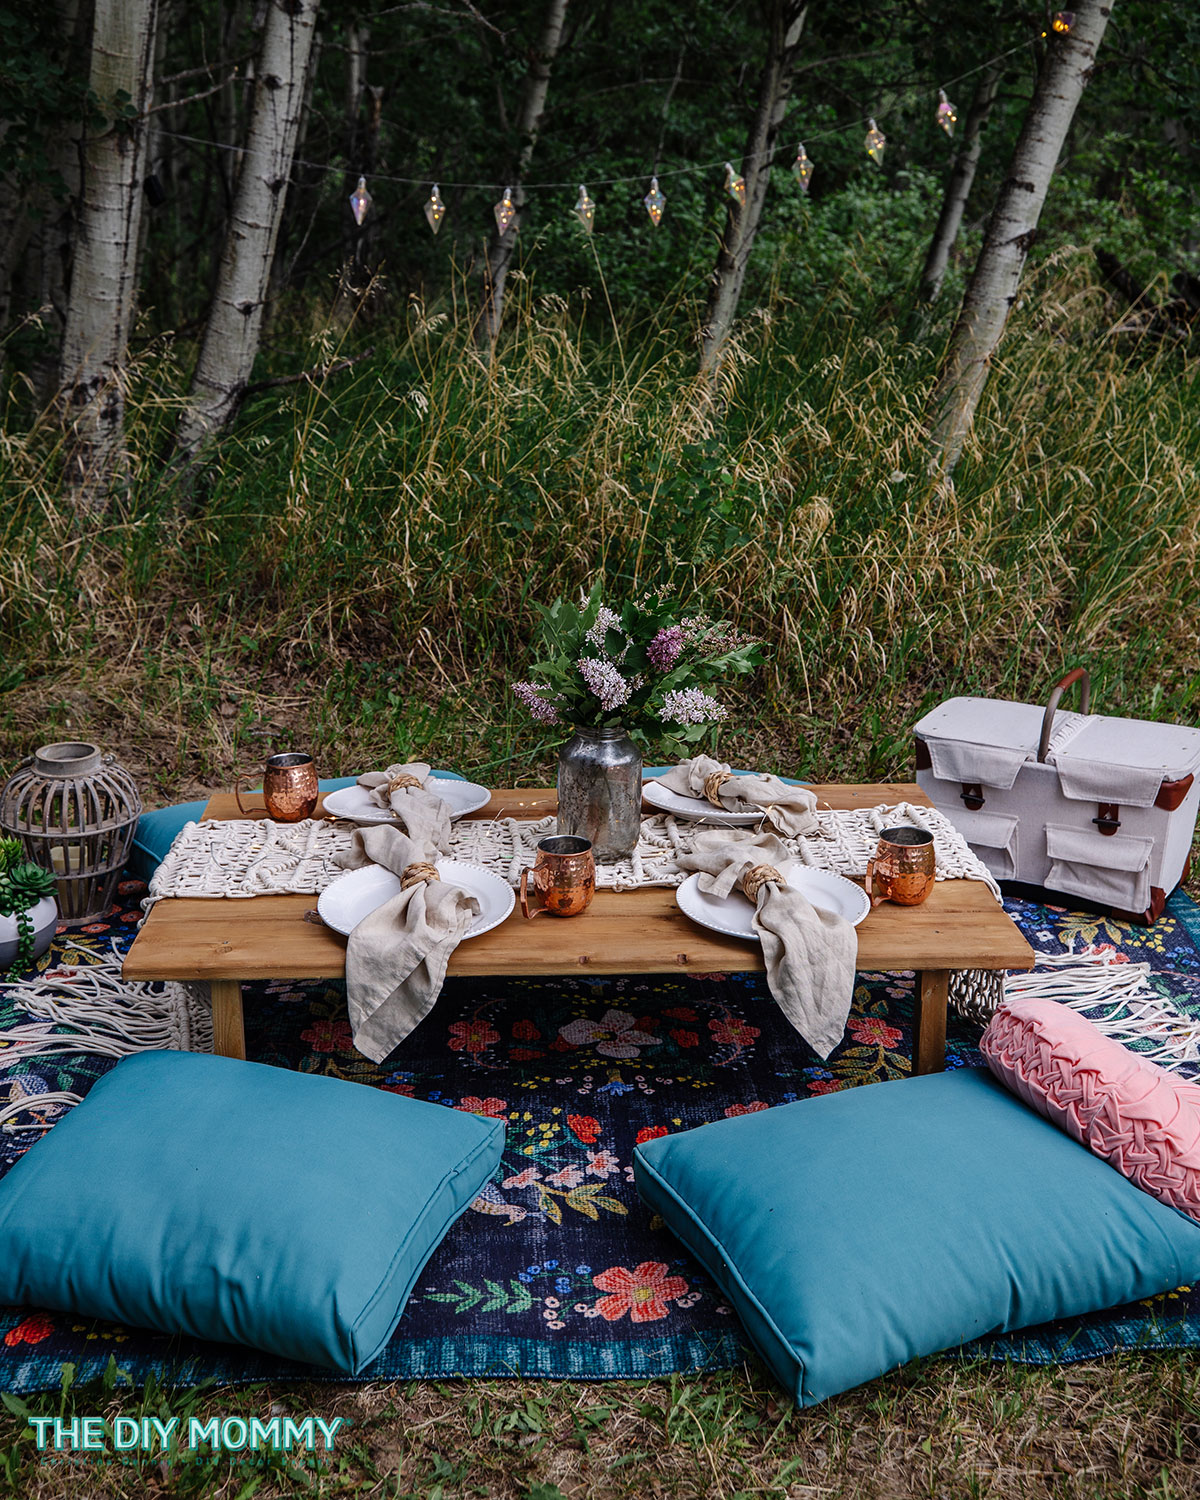
I used my DIY macrame table runner across the center of the table, some white dishes, linen napkins, and textured rattan napkin rings. This gorgeous floral rug from my studio was the perfect backdrop for this table, and I used some outdoor cushions from my porch furniture as seats. Copper mugs, lanterns, a picnic basket and flowers from the garden finish off this sweet outdoor table setting. I love how the warm wooden table looks with the other elements.
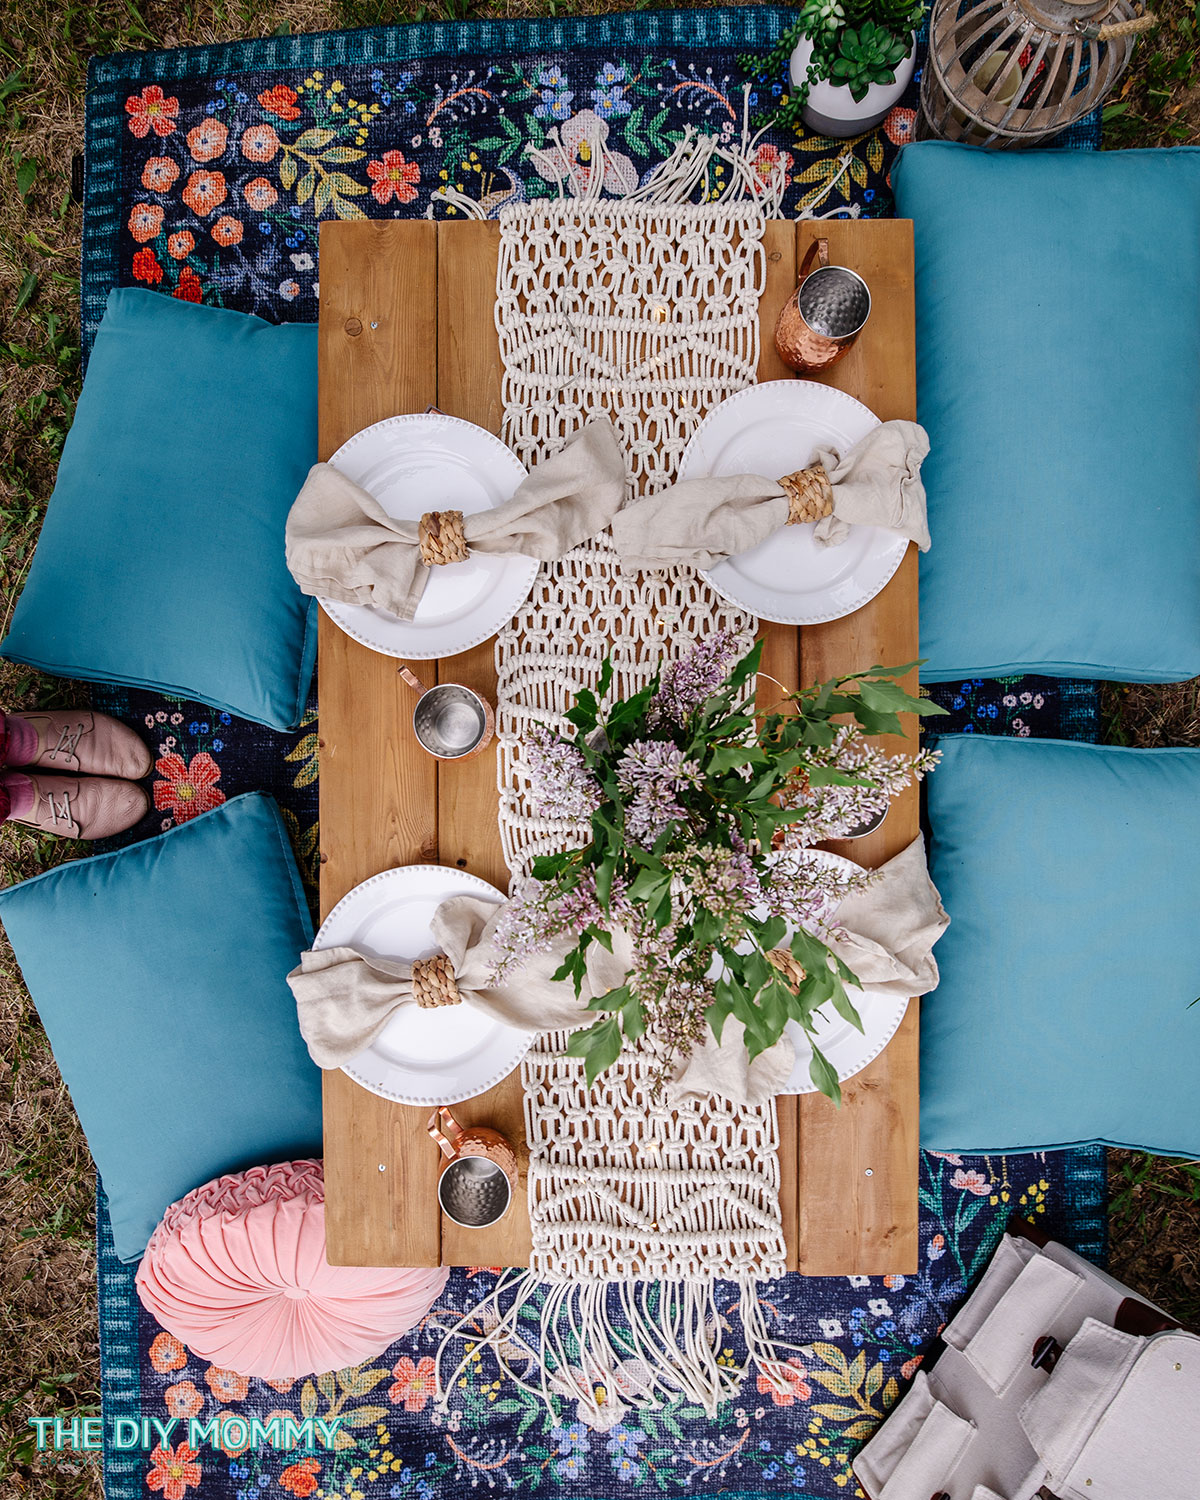
You can truly be creative with how you set up your own table. Adding cozy textiles like rugs, blankets and pillows will make your setting feel more luxurious and add comfort.
This table comfortably fits 4 people, but you could make two tables and arrange them in a row to fit 6-8 people for a larger gathering.
Building this simple DIY boho picnic table is such a fun project for the summer, and I hope you give it a try! Let me know what you think of this build in the comments below. Happy DIYing!
I absolutely love everything about this. What a perfect way to relax and enjoy Summer